I really have a thing for unusual light fixtures, for cool. unique, glamous light fixtures. I loved it when I started seeing glamous jeweled chandaliers showing up in kitchens and bathrooms. And how could I finally have a daughter in this family full of men, and not put a pink chandalier in her room!
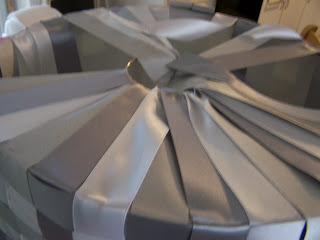
After a few nights of insomnia I realized that I my bedroom chandalier needed changing, I have recently been involved in a project that focuses on using ribbon. With ribbon on my mind I came up with a new chandalier that used ribbon. I used May Arts ( www.mayarts.com) 1.5" Taffeta/Iridescent in silver and 1.5" double satin in white to create a glamorous ribbion chandalier. Here's a look at the finished project.
What do you think?
Can't you just imagine the versions of this that you could make. Two shades of pink for bedside lamps in a little girls room. Black and whte is a game room. There are so many ways you can adapt this project. Now that you have all those ideas floating around , here's how I made it.
Materials:
1 pendant drum shade ( choose best size for your project)
1 pendant light kit
Low temp glue gun/glue sticks
clips
ribbon ( you can use whatever width you want, but I wouldn't go beyond 1.5" remember the narrower
the ribbon, the more you need). The amount you eed depends on the size of your shade.
scissors
tape measure
5" steel macrame ring
Optional:
beaded trim, glass balls
The shade that I used came from Ballard's Backroom and it was a steal! An 18" diameter pendant shade for $9.99 ! I had looked everywhere and had finally descided that if I had to pay $40+ then so be it. But believe me, it wouldn't have been with a smile like the one I wore leaving Ballard's.
- If your shade is covered in a dark color , carefully pull the fabric off, taking care not to rip lining.
- Measure the circumference of the shade and the length frm the top rim to the bottom ( add to length at the bottom so that ribbon will reach the metal ring that will be added in the middle of the diameter.
- Cut as many ribbons as required to cover the circumference of the shade in both colors. If youare using two colors, cutequal amounts of each color. I used twice as much of the silver because I used both sides of that ribbon for 2 different shades of silver.
- Cut as many ribbons as required to cover the length of the shade in both ribbons.
- Next, using hot glue, glue the ends of the ribbons around the circumference of the shade in rows. Start with one color and then alternate every other row, making sure seams are all aligned in the back. Put each row very, very close together so there are no gaps between the rows of ribbons.

6. Beginning with one piece of the length ribbon, glue one end to the top rim of the shade and weave the ribbon through the ribbons that are glued around the circumference of the shade.
7. Continue weaving with the second color, staggering them, in other words, if the last ribbon started
under the top row, the next on goes over the top.
8. Repeat this until the entire shade is covered.
9. Make sure that there are no gaps between any of the ribbons.
10. To add the ring to the bottom of the shade I made a template. On poster board I drew an 18" diameter cicle. In the center I drew a 5 " diameter circle.
I placed the shade on the outer circle, making sure all the ribbon ends were inside the circle.
11. The ring was laid on the smaller circle and the ends of all the ribbons were under the ring.
12. The esiest way to attache the ring was to take 2 ribbons from the 4 compass points ( N, S, E, W) and pull them tight, making sure the ring remains in the center.
13. You can then turn the shade over and pinching each ribbon as you take it around the ring you glue them in place.


Once I finished, I added a 4"diameter hand blown glass ball.
That's my latest project. This could be completed from start to finish in about 3 hours.


No comments:
Post a Comment