Monday, December 28, 2015

Christmas Tree Encore


Hi All,

I know it's been a really long time since I wrote a post but it isn't because I haven't been very creative lately, I have, but more on that later. I didn't want to let the holiday season end without writing about my Christmas tree encore.

A few years ago (maybe 4) I bought a really cheap  inexpensive white tree after Christmas. I think I spent around $10-$15 dollatrs for this tree. For the next 3-4 years it was the tree in my bedroom.


White tree with lavendar, purple and silver.
Last year I noticed some of the branches were kinda off white. So, I was prepaired to see more of the same this year. Well, I wasn't disappointed.

You can see the difference in the color of the branches.

So, I decided to spray paint the tree white again. But wait, if I was going to paint it, why white?

Well, I bought 6 cans of.......


Rust-oleum French Lavendar

An old fashioned line hung between 2 trees in my yard and Cass anad I got busy.


It took looking at the branches from all possible angles and  I must admit a few "needles" are still white. I call the little bits of white that's visible, "highlights".


Here is the same tree now lavendar, with the same ornaments. I will be adding a little more purple next year and I plan to paint the white strings of white with my leftover lavendar paint so they aren't as visible.


All in all, I am happy with my decision to spray paint my tree and it will only get better next year. What do you think, would you just throw away a discolored tree  or would you give spray paint a try?


 photo signature_zps7c00ce20.png

Sunday, October 25, 2015

Something Different For My Door - Wooden "Gift Tag" Door Hanger

Hi All,

It's been so long since I have written a post. I've been super busy and wanted to show you one of the things I have been doing. Somehow, I didn't see the large wooden "gift tag" door hangers until late this summer. A search on the internet says, I'm late! But, I jumped right in to make a set for my niece ( she's the one that "introduced" me to them). And of course I couldn't make just one set, so....


After ripping the sheet of plywood, I was ready to move to the miter saw.

Enough cut to make at least 12 tags.


Sanding, then drilling the hole was next.


It was almost too easy. I got so carried away I forgot to take pics of every step. But, you can pretty much figure the rest out. I used 1/2 inch plywood. The hole was made with a 1 1/8 hole drill bit.

These are the door tags that I made for my niece and also the wreath that she had me make.


These tags led to me making this set for my front door.

   This is how I'll hang this set during the week  And this ....

 This is how I'll hang these on game days!! While the tag on the right looks faded, that's the sun reflecting off that tag!

Loved these so much that I decided to make them, and sell them in my Etsy Store. www.etsy.com/shop/ReStyledCreations

What do you think? Ready to try something different on your door? Let me know what you use.


 photo signature_zps7c00ce20.png

Wednesday, July 8, 2015

Summer Converse Fun


Hi all,

Summer is in full swing and I am loving it! I haven't spent too much time in the garage working on any big DIY projects but I do have one I plan on starting soon. But that doesn't mean I haven't been working on anything. Here's what I have been doing lately....
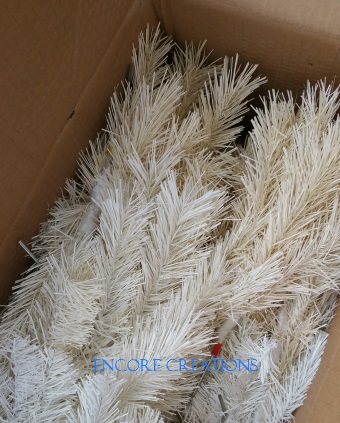
If you follow me on instagram (and if you don't, you should!) I posted a pic of a gift that a friend requested for her grandson. It started out like this...
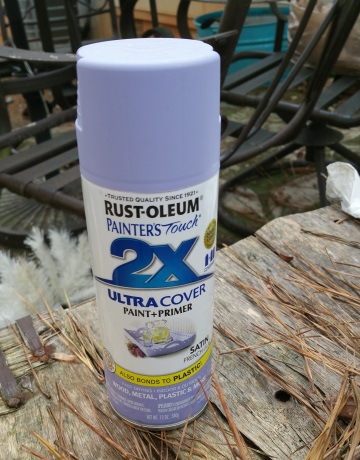
and this...
...and this is what he unwrapped !


I decided to use different fonts for each name that I embroidered on the vest.
I really like how it looks!


                                                  Chains and studs were also added.


Well, from there, I've kinda gone custom Converse Crazy.  After making his items, I had to try something for a little girl so I found out that my great neice loved Dr. McStuffins. Okay, Not having little ones at home I have to admit I had to Google Dr. McStuffins to see who/what she was. How cute is this....

 
 A three peice set , Shoes, vest and tutu!!

I found a denim vest at Target that was just her size, found the shoes while on a minivaca in Florida ( excellent price at the Navy Exchange) and Cassie tried her hand at making a tutu!  I love it!


All of these peices have some embroidered elements. The kids shoes all have embroidered patches or appliquee that I made.

Well, next came the big girl, Cassie. We found these pink "No Tie" Hightops and decided to try our hand at an ombre effect. Well, let me tell you what we learned, not all Converse are dyed equally. Even in a mild bleach solution, these went for pink to white in seconds. Oops!

                                                               Original Shoe.

                 So armed with toy buckets and a bottle of Rit dye, we created our own ombre.


                                                         Blinged Ombre Shoe

Well, I couldn't be the only one without a pair of custom Converse Shoes so....


Here's my pair. White low cut Converse with pearls on the toe and three rows of pearls up the center back and of course a turquoise monogram!!

And this is only the beginning, I have a pair of Hulk Shoes, Iron Man and white monogrammed high tops to finish. And I will be selling them in my Etsy store by July 10th. 

What do you think? Would you rock a pair of custom Converse?


 photo signature_zps7c00ce20.png

Monday, May 25, 2015

Summer Bedroom Makeover


Hi all!!

Well, spring has sprung and summer is almost here. That means , off with the heavy winter bed linens and on to something lighter. In past posts about my bedroom that featured new additions like my DIY fretwork mirrors (here) and the DIYcoffee table/bench (here) you see the touches of lavender/purple. My summer color to pair with the dominant silver and grey in my bedroom is yellow.

I scored a great deal on a summer weight silver/grey quilt at Stein Mart. On sale and with additional coupons it was under $18 for the King size!!


I actually looked it up on line and saw it selling for as much as $139 on Amazon!! Now, ask me why didn't I grab the shams while I was shopping. I don't know! But when I wwent back the nest day , yep, you guessed it, they were gone. Not to worry, for less than $14.00 I bought another quilt in a full size and made my own shams and pillow covers!


                                 I made 2 shams and of course added a yellow monogram!


I also made 2- 26 x 26 " pillow covers and added yellow ribbon trim to them. I used the pillow inserts from my "winter pillow set". I still have enough material to make a couple of lumbar pillows later.

I also change out the flowers, candlesticks and other small accessories in my room.


                              I love this embroidered pillow. Look at Trey, getting in my pic.
                                               He's sporting his summer look too !!

I have tried out a couple of different paintings/pictures on this wall for summer. I think this one's a keeper. I didn't take a close up of the picture frame before I gave it an encore, in too much of a hurry to finish. But here it is in a picture of all the stuff I bought for $10 at a recent yard sale. I paid $2 for the large picture.


                                                  Of course I bought it just for the frame!

I was walking by the posters in Hobby Lobby on my way to look for fabric to frame and hang in my room when I spotted the 90% off section. It couldn't hurt to look  now could it. Score....


Again, in a hurry I didn't get a pic before I cropped the poster to fit the frame, but it was only $1.80!!  I used spray paint that I already had. So that makes this a $3.80 picture. Love It.  Couldn't get a good "head on" shot as the glass kept reflecting the chandelier in the room. So, I'm ready for summer in my sunny bedroom.


 photo signature_zps7c00ce20.png

Saturday, April 11, 2015

DIY Coffee Table to Bench Encore


Hi all,

After finishing my mirrors, I went right into another long overdue project. I have had a small little bench at the foot of my bed for years.  I found her on the side of the road back in Southfield. She was in really good shape so it just took a can of paint and piece of velvet and she was good to go.


                                                    This little girl was found on the curb.

I have since longed for a larger bench at the foot of my bed. Well, I knew I wanted to give a coffee table an encore and make it into my bedroom bench, it just took me a while to find one that I liked.


                                                         $10 Coffee Table

This one was at the right place at the right time and the right price. How many of you know someone who had one of these?  So, for $10.00 my hunk brought this hunk home for me.

Since it was going to sit right across from a vanity painted in Annie Slaon Paris Grey with silver accents, I knew I had to paint this the same color. All of the rest of the furniture in this room was silver.

I painted this piece very quickly and didn't bother to paint the top as it wouldn't be seen due to the upholstered top I planned to add. I didn't like the faux wood ( plastic) "thing" on the sliding door, so I removed the door and made a new one  from the 1/4' plywood that I had on hand. I added moulding to the door for a more finished look. This was pretty easy except  that I had to remove and sand the tabs a few times to get them the right thickness and height to slide freely in the grooves.


 Once it was painted I sealed it with Annie Sloan Wax. I joined two different pieces of 3" thick foam that I had left over from other projects using 3M Spray Adhesive. The fabric was a great price at my favorite fabric store, Fabric and Fringe in Marietta, GA. I used the spray adhesive on the top of the "bench" to a attach the foam. I then just stapled the fabric to the foam top. I added a plain trim around the edge under the top to finish off the edges.


The door was just a little too plain so as I looked around my garage, I noticed a picture frame that I hadn't used in years. I took the back off and spray painted it with silver spray paint to match the vanity. You can find the greatest drawer/door handles at Hobby Lobby these days.


So, for just a bit of glam I added one and she was done. At first it looked really big in my room but I still have more than 3 feet between it and the vanity and I've grown to like it's "ample" size.

I thought about adding bun feet to the bottom but am glad I didn't becasue the current height is just right. It's so comfy that I sat down, leaned back on my bed and watched a whole episode of Rehab Addict.


                                        Cass tried it out last weekend! It was a hit. Total cost was less than $35.00!!


I think I'm done with this room.  For now!


 photo signature_zps7c00ce20.png