Wednesday, September 24, 2014

DIY Canvas Wall Art

Hi all,

This past summer (boy, didn't it fly by) while shopping  with Cass, we came across an inspirational sign that we both liked.  


I loved what it said, but I wasn't sold on the size, colors, or the price ( $20.00). So....

With so much going on, I still decided to make one. Armed with my trusty 40% off coupon from Hobby Lobby, I bought a 2 pack of blank canvases. I chose the 16 x 20 canvas as it was a little larger than the one we saw in the store. 


I ran out of time and it just had to wait. After packing Cass off to school, I finally got around to finishing it. just in time to take it with me to Family Weekend at UNCG.

To get the look I wanted I  realized that I already had a lot of the necessary materials from previous projects. 


Supplies:
 4" chipboard letters
3" chipboard letters,  
1.5" chipboard letters 
stickers, glue stick, ruler, white pencil, 
Rustoleum spray paint in Lagoon,
acrylic paint (grey), paint brush and small dish.

 From all of the supplies, the only thing I bought  new were the  2.5" and 1.5" letters. Using coupons and clearance prices my total expense was less than $13.00. Not super cheap, but that will make 2 larger signs, so I'm good with the cost!

I measured and divided the canvas into 3 "somewhat" equal sections. Now, I can't draw at all, and am challenged drawing a straight line with a ruler, but I gave it a try. I lightly glued the  larger letters in place. Once I was sure it would all fit, I painted the canvas.

This was after 1 light coat. I gave it 3 light costs of spray paint.

After the 3rd coat I carefully pealed the letters off the canvas.


In a few places , like the H, the spray paint made it under the letter, creating a shadowy effect around the edges. I kind of liked it. Now, putting the stickers and the smaller letters down was a lot more difficult. So much so that I forgot to take pics of the process. 
Basically, I used a ruler and white pencil to create guide lines. I eyeballed the spacing for the stickers and the smallest chipboard letters. I put the small chipboard letters in place first, then the stickers.

If you've every tried to use "what's left over" from a package of stickers, you know it never quite works out. You end up "making" extra letters. Well, I found that the "n" turned upside down gave me more "u"s, and the "v" with a tail from a "g " gave me extra 'y's. It worked!!

To cover the white guide lines and to add a little dimension to the sign I dry brushed  some grey acrylic paint onto the sign and DONE!


                                                            hanging on the wall.

After hanging that on the wall, I finally felt like her room was really close to being complete. Neither Cass nor I liked the royal blue task chair in her bedroom so...


You know it, one faux sheep skin from Ikea, some stick-on Velcro and a pair of scissors later.

Cass now  feels like her room is complete...


It all works, the orange and white rug, the extra storage under the desk and one under the bed.


                                    Desk organizer: silver tray with hand dipped glasses. I couldn't resist that travel cup when I saw it.


                                                       Finished bed.


                                    Two large monogrammed pillows added to her bed for a little more color.


                                                            Now she likes the chair!!


                                     Family Weekend was great! We got to see our baby girl....


                                                                      growing up!


Sunday, September 14, 2014

Ideas for Bathroom Reno

Hi all,

I hinted in my last post that I hadn't forgotten about the ranch reno. There are a couple of things going on there. The living room and hallway walls have been prepped for painting. Lot's of holes in varying sizes have made that an interesting job. A couple of large holes required a little more than spackling and a quick sanding.


The larger holes required something else. One hole was fixed by tying a piece of string thru a flexible piece of plastic mesh,. the mesh was bent enough to put it thru the hole. Using the two end of the string the mesh was pulled tight against the hole from the inside. Of course before pulling it tight, spackling was squirted around the edges of the mesh. This made it stick to the inside of the wall. We did have to eventually tie the string to the step stool to keep it tight against the wall, well it was that or stand there holding the string for quite a while.

While the original plan was to personally paint the whole interior it has grown a bit. Now, the exterior has been added to the project. So the process of interviewing painters  is taking up a lot of time, but you have to do your homework.

When I realized all the estimates so far included filling and sanding holes in the walls, I was so done with spackling. Next there's making a final decision on paint colors. The only decision so far has been the exterior colors, going for lightening up the exterior  so this was the choice:

                        Sherwin Williams photo showing : Cork Wedge,  Smokehouse and Rustic Red.

A new front door in almost this exact "Rustic Red" was the find of the week a couple of weeks ago at the ReStore in Canton, GA You'll see it in a later post. The shutters will also be in Rustic Red .

A  more recent trip to the Habitat ReStore in Lawrenceville, GA led me  to another  great find. All of the tile was 20% off, and they had a lot to choose from. I found a really great buy. They had  almost 3  full boxes of 6 x 6 slate tiles ( a total of almost 132 tiles) for $6.00 per box. With the sale, I got the tile for $12.72!! I used this great tile calculator  and allowing for 5% waste and the fact that I will add an accent tile, it qualifies as a major SCORE!!


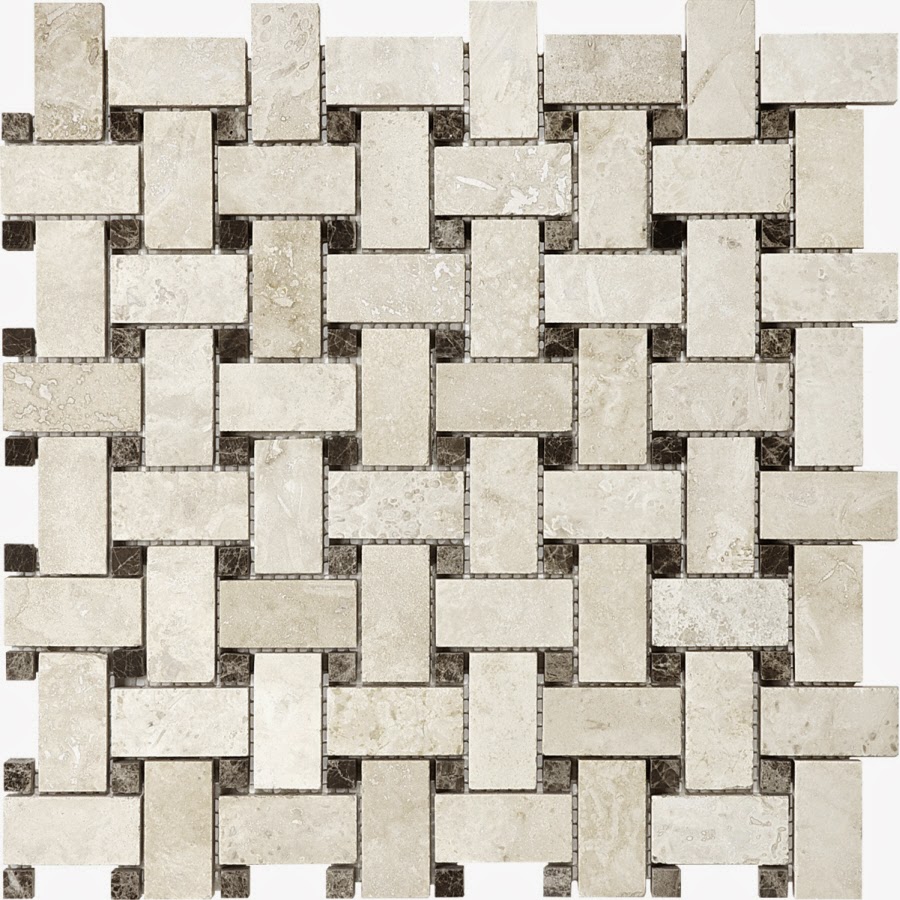
I am thinking about using one of these tiles as an accent tile with the charcoal slate on the floor.
I would cut this into 3 " strips and use with the slate.


 or 


So, as you can see there has been some forward movement on this project. Oh, and if you remember there was a post about using Ikea pieces for a "built in" in the living room, still trying to make something fit in the 134" of wall space available. And the saga continues....


Tuesday, September 9, 2014

A Whirlwind Summer Comes to An End.Back to Work!!


Hi all.

Well summer is winding down and maybe things will settle down around here. There's been so much going on in such a short period of time.  I shared with you my work on my mother's breakfast nook and kitchen. Well, I guess I didn't really share. That's because we still aren't finished, but here's just a peak... 

                                          
                                                     Old cabinets and counter top.
                                                            Cabinet doors painted white.


Cameron helping to paint after wallpaper was removed. I love the blue with the white trim!

Right after returning home I set off again to move Cass into her college dorm, I shared a little of that!

                                                     Monogrammed bath towels

 Desk
Once Cass was settled in, I was facing our family reunion in Alabama. But wait, just before that
I decided that I had to get rid of some of the stuff in my garage so I held a one day yard sale.OK, there was no rain that day and the temps were in the high nineties.Talk about hard work, whew, that was hard work. But I must admit it was worth it. One more like that and I will have my garage back. I'm shooting for late September. 

Then, I was off to Alabama for the 14th Curry Family reunion. This one day event is held every year at the family homestead in Munford, Al. This was the land that my mom grew up on, it belonged to my Great Grandfather, Peter Curry. This is always held the Sat. before Labor Day and it's  always great fun.

                                                                 Family and Friends!! 

                                               My uncle Harry , cousin Freda, my Aunt Ruth and my mom!!


                                                         Cousins and friends: Linda, James, me and Jesse.
 
                                                My great niece Ava holds her own with the fellas!

Whew, I'm tried just thinking about all of that work and fun in just 4 short weeks. Next, back to the ranch renovation.  You didn't think I hadn't been working on that too did you?!! Stay tuned, I've got a lot to share about the renovation..