

In a previous post I wrote of my interest in using wood
pallets . Well, after a trip to IKEA and seeing an outdoor sofa sectional (Arholma, below ) that I
loved, but wouldn’t dare buy. I was not
spending $600. I started thinking about cheap, no cheaper, like next to free, so it was back to making something out of pallets.

So, in search of pallets I went. After looking on Craigslist and seeing
pallets both for sale and free, I decided on free ( Of course). Time got away from me and as
I went about my work, I came upon my first free pallets. I loaded them (3) into
the back of my SUV and off I went. Of course I did go into the auto repair shop and ask if I could have them first. If you are looking for pallets, ask first. A few days later I found four more
pallets. Now, as I look back at how easy
this project wasn’t, I think any future pallet projects will have me buying
pallets. That way I can make sure they are in
great shape and are all the same size. Trust and believe, all pallets are not created equal, even if they look lke it.

I did surf the web looking at pictures of sofas and outdoor
sectionals made from pallets. I won't show them to you , but just Google "sofas from pallets "or something similar and you'll see more than you can imagine. From these
I created a design plan complete with materials list. If you plan to make anything out of pallets, do a little research first. You want to make sure you aren't using pallets that have been chemically treated. Online there are tons of great articles and project ideas for using pallets. And we won't even mention Pinterest for more ideas. But back to my project. I made a run to Lowes for screws, nails, plywood, primer and paint and it was Game On.


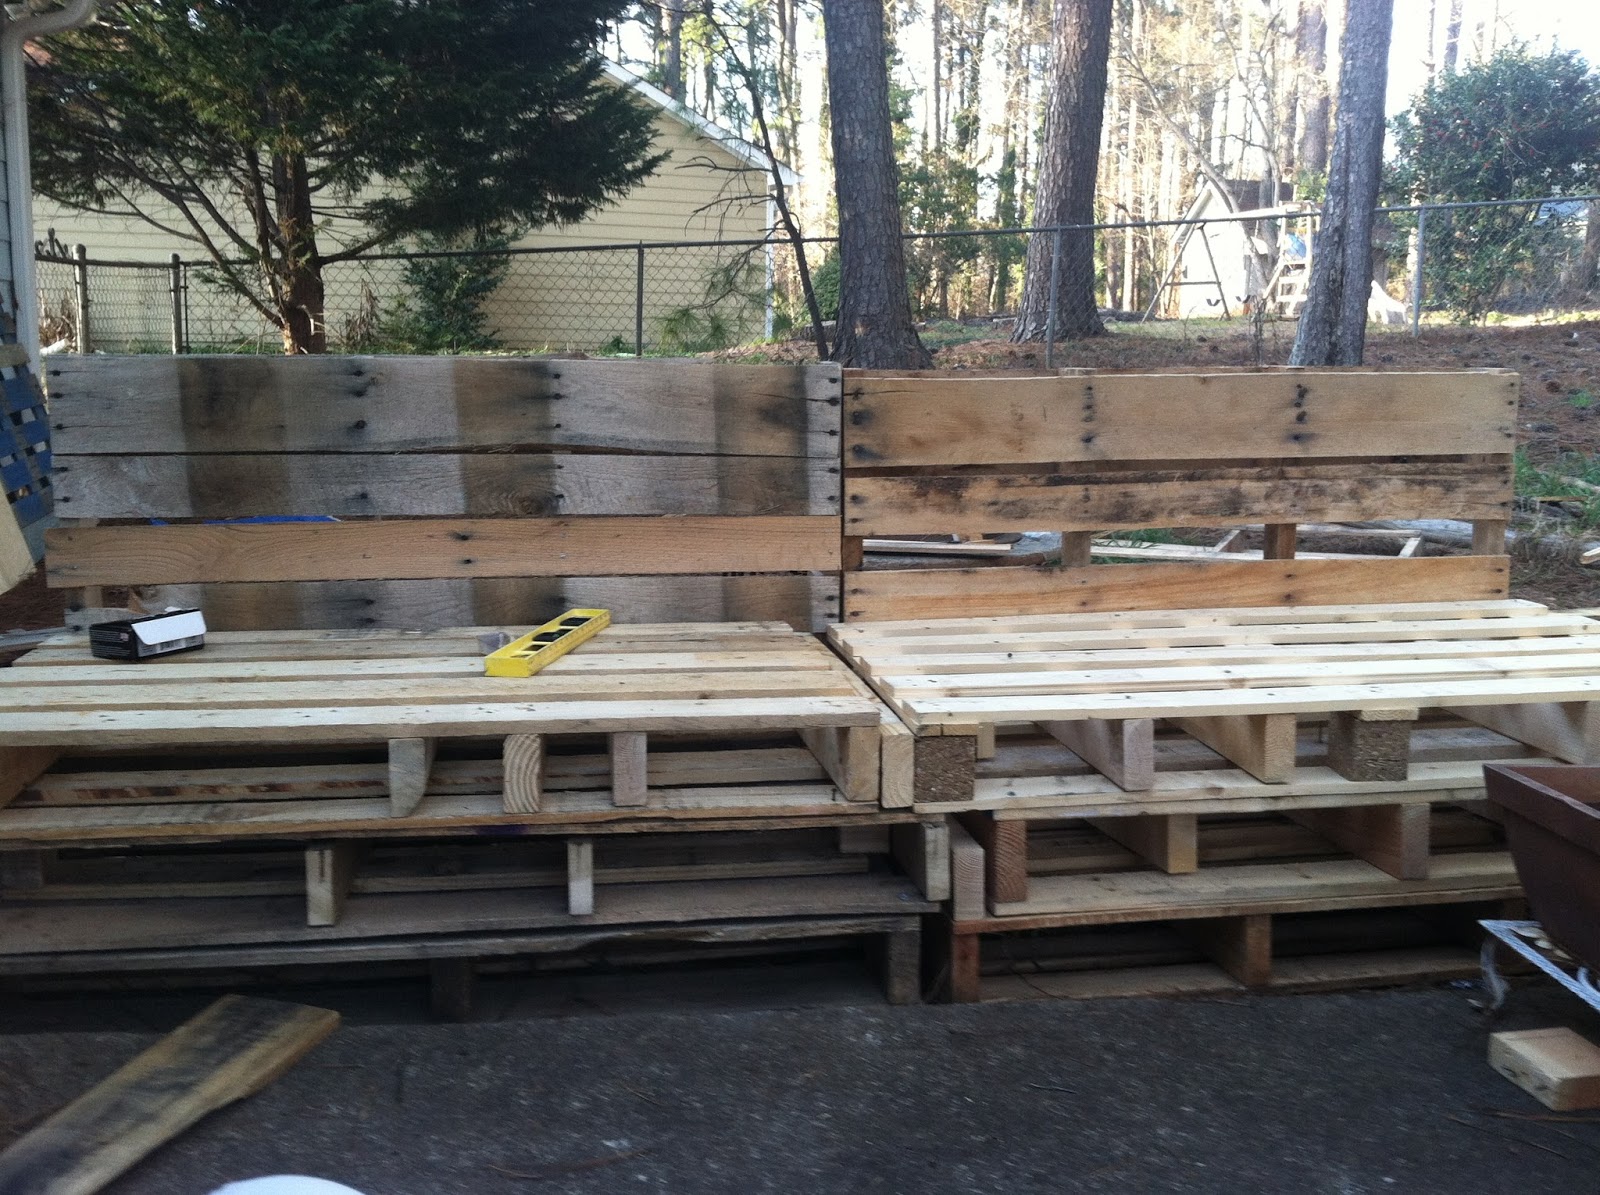
My son Brandon and I started out with specific measurements for this piece but, soon changed
them to accommodate the varied sizes of our pallets. After finding 2 pallets that were the same
size to act as the bottom layer, we then had to cut and make subsequent pallets
meet those dimensions.

![]()
 There's nothing cute about taking apart wood pallets and I have the picture to prove it!


He primarily cut the basic structural pieces and
cannibalized pallets as needed. These things are not made to come apart easily. If you've ever tried to pull a twisted nail out, yea, no it is not easy. Before we finished the project he had to move out of state for school. He did
leave me with the basic structure complete. I
spent time reinforcing the layers
of pallets. They are stacked 3 high to give me a height of approx. 16”. Some of
the pallets were reinforced with 2x4s
every 12” while others were not. Wanting to use as much of the pallet as possible I had to find a way to complete the cannibalization of the pallets, by someone if very little upper body strength, that would be me! I ended up using a cut off wheel on my Dremel and cutting off the heads of nails after prying and pulling them up just a little. As I
wanted to be sure this piece would support
at least 3-4 people sitting on it, I added additional 2x4’s as support where needed.

After the base was complete, I screwed down a sheet of plywood on top of the pallets. Based on my construction plans I did not have to do a lot of sanding on this piece. More cannibalizing of pallets gave me “slats” to put across the outside back of the sofa. Due to rain and the extreme pollen count I could not prime and paint right away. So I moved on to the cushions.
After the base was complete, I screwed down a sheet of plywood on top of the pallets. Based on my construction plans I did not have to do a lot of sanding on this piece. More cannibalizing of pallets gave me “slats” to put across the outside back of the sofa. Due to rain and the extreme pollen count I could not prime and paint right away. So I moved on to the cushions.

If you have every bought foam for a project you know how
expensive it is And that's why cushions are so expensive.
I hit the jackpot when it came to making
cushions for this sofa. I found
precut 25’ square foam cushions that are 5” in height for $5 each , so I bought 3!!. I ran into Old Time Pottery and discovered
they were having a sale on their fabric. I found a piece that I thought was an
outdoor fabric that I liked. I took a minute to research the manufacturer and
the design and discovered that it was considered a premium outdoor fabric that
retailed for $34.99. Score!! It was on sale for $3.96 per yard. The piece ( at
OTP you have to buy the whole precut piece) was 5 yrds. At the time I didn’t
know how much fabric I’d need but figured if that wasn’t enough I could add a
complimentary solid fabric on the back of the cushions.

I added piping to the cushions in a solid color . I admit I was too lazy to cut bias strips, so I bought 6- 3yd packages of double wide bias tape (on sale for 40% off). That’s about $47.00 for 3 cushions. Most of the cushions I priced at stores were costing $29-39 each and they weren’t as thick. I am so happy with these cushions. Now, as always, I was looking for a way to make the cushions for the back of the sofa as cheaply as possible, here’s what I did. I was going to buy new bed pillows for our beds so the old pillows were used in the back pillows outside. They are the perfect height and I’m recycling, etc.!!

After I finished the sofa, ( well there is a small place on one side that needs a couple of boards, but...)I decided to make a table. A couple of weeks passed and I was looking for pallets to buy for about $2.00 each. I did find some but knew I couldn't go pick them up myself. You see, in my excitement to get the first set of plalets I lifted too much weight and tore an abdominal muscle. That and the pollen really slowed this project way down. I again looked on Craigslist and found a local business that had pallets out back, free for the taking. When Brandon came back into town to help me clean carpets and get ready for his sister's graduation party, we went pallet hunting. He wasn't nearly as excited about it as I was.
I found a pallet that had a solid plywood top and 2 others that required only one cut each and , I had a table. I wanted to be able to move the table, so I bought 4 swivel casters ( only 1 is a locking caster). The total cost of the table was less than $20.00 ( calculating the cost of the screws, nail, casters, primer and paint. I love that I can travel 3 miles in opposite directions and get to either Lowes or Home Depot!!

After nailing them together, priming and painting ( Cameron, son # 2 was home for the graduation so this was his part) was done.


Trey loves to follow me and check out what I'm doing.

He also like to lounge on my new outdoor sofa.
This project was a lot harder than it had to be. I now know just how carefully to measure amd size up pallets for future projects. Also, it is a good idea to take the time and paint everything before you assemble it. I have some places that I just couldn't reach after it was assembled. I also used screws so that when I move, I can remove a few key screws and move this in 2 easy peices. Yea, I know I said easy, I meant for the movers, not easy for me!!

You also want to be flexible between what you envisioned and what you end up with. This sofa ended up with an attached end table. There was 17" left that wasn't covered by cushions and instead of making a little dinky cushion, I crafted a table top for dinks, etc. and attached it to the end. I love it.
All in all, I am out of less than $70 for the sofa ( that includes, screws, nails, a sheet of 5.8" plywood, paint and primer but without the cushions). I love this project , it taught me a lot and now I have the perfect place to kick back and enjoy a Strawberry Vodka Lemonade in the evening.

What do you think? Do you have a project that you want to make using pallets? Let me know about it and share pics.

Hi Tina! Stopping by to say hello from Shelly's blog. I love your outdoor sofa. Such a great spot to relax. Congrats on building your own.
ReplyDeleteAwesome turn out! Once again awesome
ReplyDeleteThis is pretty impressive! May I ask how you were able to paint the pallets? Did you have to take them apart to do that or just use spray paint?
ReplyDeleteEverything looks amazing!i love your talent.thanks for sharing.online beds for sale UK
ReplyDeleteYou did a great job with these! I love the way they turned out! I found you on Miss. Mustard Seed! If you like to link up come over to Craft Frenzy Friday at www.craftdictator.com!
ReplyDeleteFabolous turnout, i love your outdoor sofa.MEMORY FOAM MATTRESSES
ReplyDeleteNice tips dear. Thanks for sharing it cast iron casters & heavy duty steel casters
ReplyDelete